Making the Files Public:
To upload a file, navigate to the Files related list and use the upload function. This standard method allows you to attach the file directly to a record. Alternatively, you can utilize custom solutions, such as flows or Lightning Components, to manage file uploads according to specific needs or workflows.

After uploading a file, you can create an unrestricted public link by selecting the “Public Link” option at the top of the file’s detail page.

This action generates a public link for the specific file. With this link, anyone can view and download the file from the internet. You can copy the link and share it with anyone you wish.

Everything was functioning as expected up to this point. However, there are a few issues to consider. Firstly, the process involves multiple clicks and manual copying of the link, which is not ideal and lacks automation. Secondly, if you create a formula field to display an image using this public link, the image will not render correctly. While this may seem like a limitation, there are alternative methods to address this issue internally.

Using Flow to Generate Public URLs:
ContentDelivery (API name: ContentDistribution) is the object used to make files public. By creating a ContentDistribution record related to a ContentVersion, a public URL is generated for that specific file version. When using the Public Link button, it also creates a Content Delivery record.
To automate the process of uploading a file and generating a public URL, follow these steps to create a screen flow:
Screen Flow to Upload a File and Generate a Public URL
1. Create an input variable named `recordId`.
2. Add a screen element with a file upload component. Configure it to allow only a single file to ensure the flow operates with one file at a time.

2. The standard file upload component does not have a setting to make it mandatory. To address this, you can include a decision element to verify whether the user has uploaded a file. Note that this step is optional and can be omitted if you prefer.
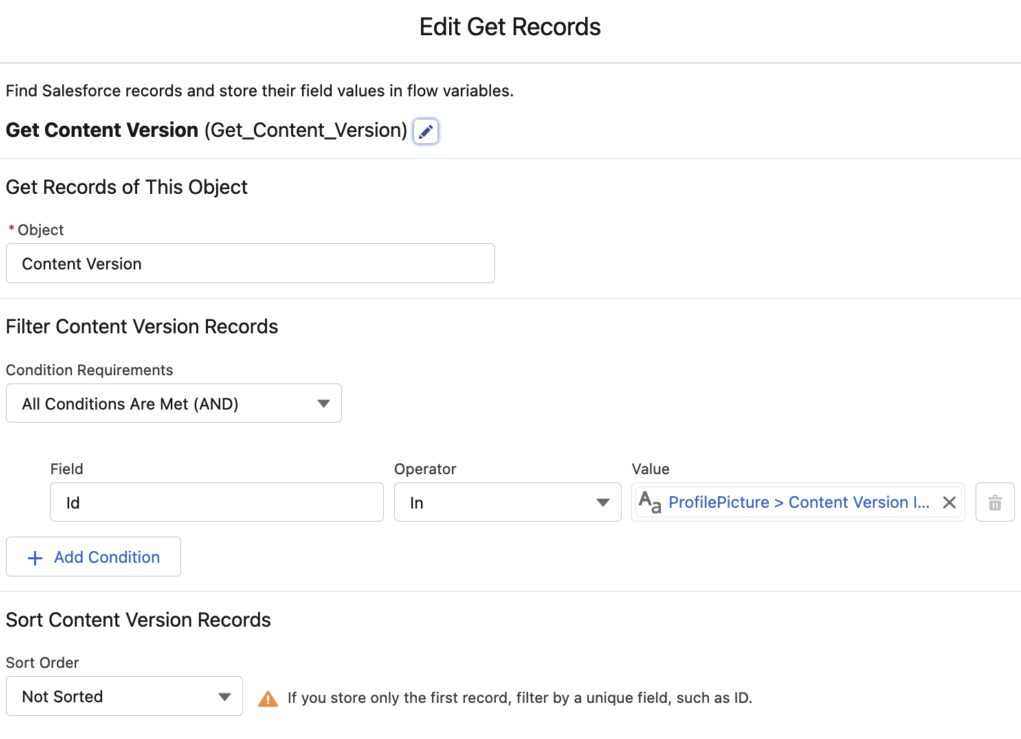
3. Even though you only allow a single file upload, Salesforce stores the IDs of content versions in a text collection named `ContentVersionIds`. To retrieve the specific content version record, use a Get Records element. Utilize the “In” operator, introduced in Winter ’23, to efficiently query the content version record.

4. Create a ContentDistribution record with the values from the ContentVersion record that you got in the previous step. Don’t forget to make PreferencesAllowViewInBrowser true. You can set the other preferences as well.

5. Get the Content Delivery that you created in the previous step.

6. Content Delivery has two fields that get auto populated. DistributionPublicUrl stores the public url of the file. Anyone with this link can view the file in a container. However, it is not possible to use this public URL in an img tag. The second auto populated field, ContentDownloadURL, contains the link to download the file and it is possible to use it in an img tag. Therefore, this is the field that we, as a customer or Salesforce Partner, need.
Add an Update Records element to update your record. In this example, value of ContentDownloadURL is saved to Profile_Picture__c field.

7. Optionally, add a success screen.


